Setting up Openshift single node in your own Homelab
October 6, 2022Intro
So i wanted to run OpenShift in my Homelab. Why? Because i can, and i had some spare time ;-).
For a long i wanted to setup a Openshift cluster in my own Homelab. Due to resource limitations i can only run one Openshift node. After many moons of searching and testing, i have found a very convinient way to enroll a single node OpenShift 4.11 (OKD) in my Homelab.
Preperations
First, there are some preperations to be done;
- A machine that can run
podman, in my case i have a separate VM calledokd4-serviceswhich hosts mypodmanpods. - A virtual machine with the following specifications (this is what i have observed as the absolute minimum):
- 8 vCPU’s
- 24 GB (!!) of memory
- 100GB disk
- If possible, a DHCP reservation on the mac address of the VM.
- A dns zone that you can use in your own homelab, because OpenShift heavily relies on DNS. This is the dump of my DNS zone called
okd.alcatrash.net.
$ORIGIN .
okd.alcatrash.net       3600    IN      SOA     ns1.alcatrash.org hostmaster.okd.alcatrash.net 2022090510 10800 3600 604800 3600
_etcd-server-ssl._tcp.okd.alcatrash.net 60      IN      SRV     0 10 2380 etcd-0.okd.alcatrash.net
api.okd.alcatrash.net   60      IN      A       10.99.1.201
api-int.okd.alcatrash.net       60      IN      A       10.99.1.201
*.apps.okd.alcatrash.net        60      IN      A       10.99.1.201
console-openshift-console.apps.okd.alcatrash.net        60      IN      A       10.99.1.201
oauth-openshift.apps.okd.alcatrash.net  60      IN      A       10.99.1.201
console.okd.alcatrash.net       60      IN      A       10.99.1.201
console-openshift-console.okd.alcatrash.net     60      IN      A       10.99.1.201
etcd-0.okd.alcatrash.net        60      IN      A       10.99.1.201
okd4-control-plane-1.okd.alcatrash.net  60      IN      A       10.99.1.201
okd4-services.okd.alcatrash.net 60      IN      A       10.99.1.210
As you can see we have several dns entries; 2 times a A record for the hosts okd4-services and the okd4-control-plane-1. The rest are mandatory DNS records needed for OpenShift to work properly. You can take a look here for more information.
- The
podmanhost must be reachable from the OpenShift node.
Starting the OpenShift Assisted installer
So first, login to your podman node. After that, clone the following:
[michael@okd4-services ~]$ git clone https://github.com/openshift/assisted-service.git
Cloning into 'assisted-service'...
remote: Enumerating objects: 60092, done.
remote: Counting objects: 100% (24/24), done.
remote: Compressing objects: 100% (23/23), done.
remote: Total 60092 (delta 5), reused 10 (delta 0), pack-reused 60068
Receiving objects: 100% (60092/60092), 67.53 MiB | 8.06 MiB/s, done.
Resolving deltas: 100% (41319/41319), done.
Updating files: 100% (12157/12157), done.
[michael@okd4-services ~]$
After that, cd into the assisted-service/deploy/podman directory.
after that, take a look in the directory:
[michael@okd4-services podman]$ ls -lah
total 44K
drwxrwxr-x.  2 michael michael  185 Oct  5 21:38 .
drwxrwxr-x. 12 michael michael 4.0K Oct  5 21:38 ..
-rw-rw-r--.  1 michael michael  249 Oct  5 21:38 configmap_tls_certs.yml
-rw-rw-r--.  1 michael michael 2.8K Oct  5 21:38 configmap_tls.yml
-rw-rw-r--.  1 michael michael 4.6K Oct  5 21:38 configmap.yml
-rw-rw-r--.  1 michael michael 1.8K Oct  5 21:38 okd-configmap.yml
-rw-rw-r--.  1 michael michael 1.1K Oct  5 21:38 pod-persistent.yml
-rw-rw-r--.  1 michael michael 1.6K Oct  5 21:38 pod_tls.yml
-rw-rw-r--.  1 michael michael  810 Oct  5 21:38 pod.yml
-rw-rw-r--.  1 michael michael 4.7K Oct  5 21:38 README.md
Here is a file we need to edit.
Edit the okd-configmap.yml and replace the ASSISTED_SERVICE_HOST, IMAGE_SERVICE_BASE_URL and the SERVICE_BASE_URL variables with the ip address of your host where you run the podman pods on.
In my case, it looks something like this:
[michael@okd4-services podman]$ cat okd-configmap.yml
apiVersion: v1
kind: ConfigMap
metadata:
  name: config
data:
  ASSISTED_SERVICE_HOST: 10.99.1.210:8090
  IMAGE_SERVICE_BASE_URL: http://10.99.1.210:8888
  SERVICE_BASE_URL: http://10.99.1.210:8090
  ASSISTED_SERVICE_SCHEME: http
...
After that, the README.md states we need to run the following command for the podman pods to start. podman play kube --configmap okd-configmap.yml pod.yml
This run will be without data persistence. Should you require data persistence, than take a look in the README.md on how to proceed.
[michael@okd4-services podman]$ podman play kube --configmap okd-configmap.yml pod.yml
Trying to pull quay.io/centos7/postgresql-12-centos7:latest...
Getting image source signatures
....
Containers:
0f00fac2dfbcc183270210bb0a689ac3ddf9f22f2a98aa49a526f01368ba9a2e
f00ff1daf4a5b869badec77c4931f1496d95eac86be29f6f06404d83ace5f6f4
75dc84c2d958f6716c66c449a7ec46a36ac556df2e60e6e155412b5741829a50
8b1a32f5055e85ba12a62b86c93a070f349906ddfe8cfc903771b5d37db8cedd
After that, we can login into the assisted-service web interface by visiting the url where the pod was started. In my case this is http://10.99.1.210:8080.
Creating a cluster in the Assisted service / installer
After logging in on the web interface, you will see a nice interface:

click on Create New Cluster
Now you will be shown a screen where you can setup the cluster. Make sure to enter the correct Cluster Name corresponding with your DNS zone. In my case my cluster name will be okd and my base domain will be alcatrash.net.
Also make sure to check the box Install single node OpenShift (SNO)
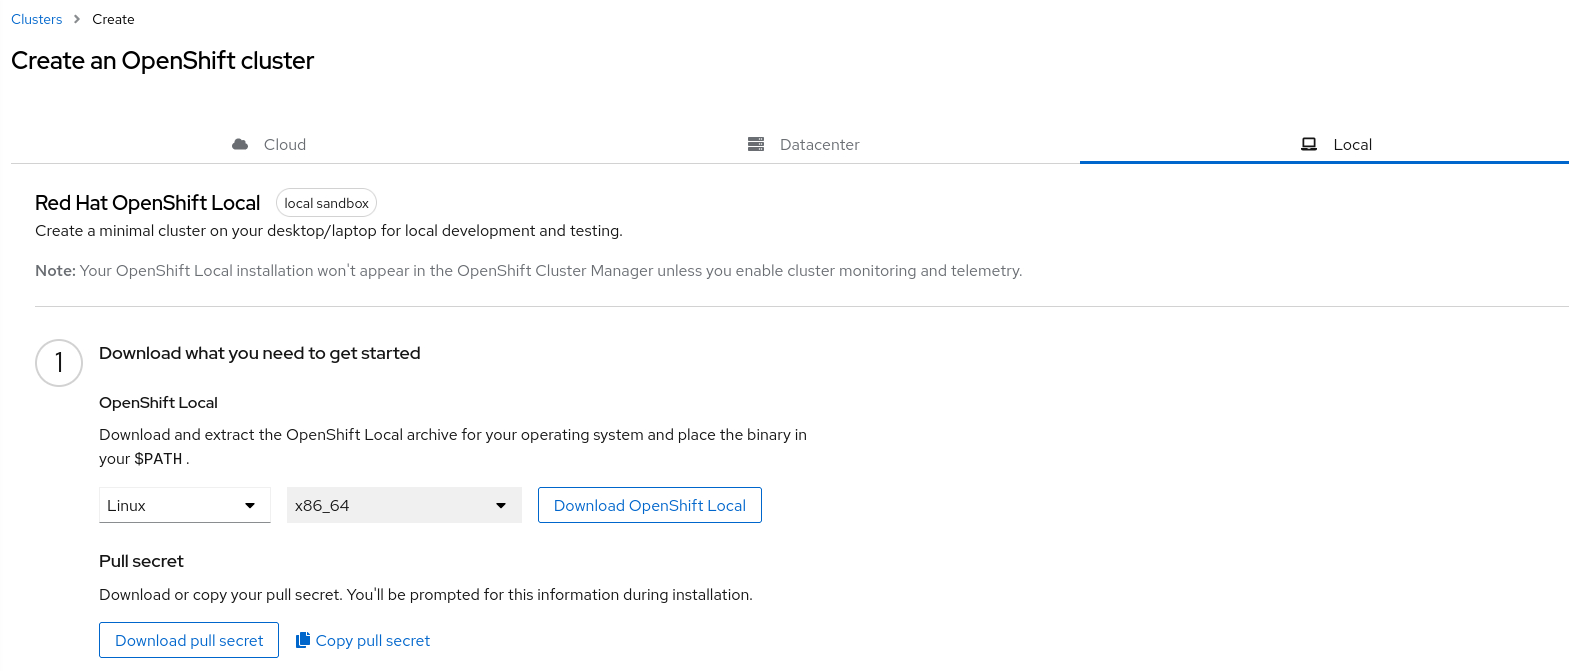
After that, insert the pull secret for the Red Hat container registry. Your pull secret can be retrieved from the https://cloud.redhat.com/openshift/create/local url. Login with your Red Hat credentials. After that, you will be prompted with something like this:

Click on Copy pull secret and paste it into the assisted installer screen.
After that, you can choose for Host networking either DHCP or Static. In this example i have created a DHCP lease for my Openshift node in my router, so i will choose DHCP here.
After that, click Next. After that, you will see the Operators section. We are not going to use any operators from here, so click Next.
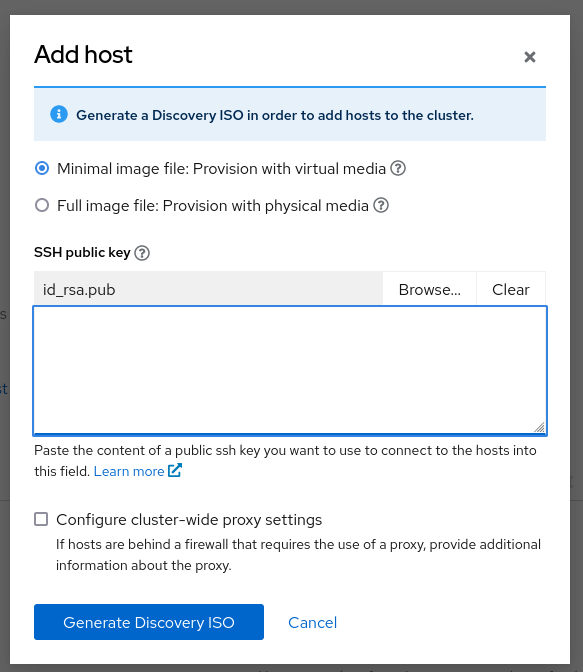
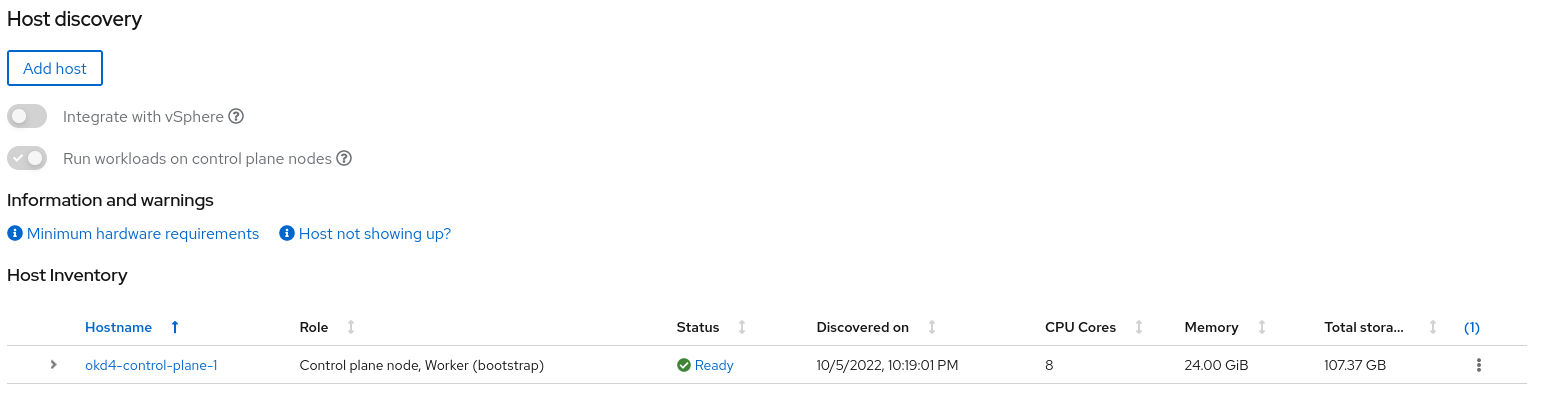
After clicking next, you will see the Host discovery screen. Click on the Add Host button. In this menu you can paste your SSH key. Insert your SSH key and choose the minimal image file. After that, you can click the Generate Discovery ISO Button. Now the magic will happen ;-).

At this point, the assisted installer generated a iso that can be used for provisioning the Openshift node.
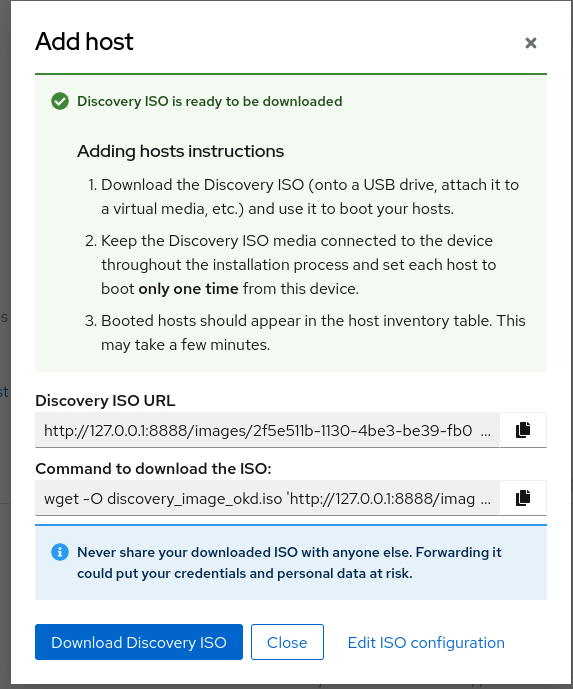

Download the ISO by either copying the url or the wget command into your terminal and save the iso. Make sure to save it somewhere where you can mount it on your hypervisor.
Booting your VM with the ISO
At this point we are ready to boot the VM with the ISO attached. In this example i will use Proxmox, as this is my Hypervisor in my homelab.


The VM will boot and will call home to the assisted installer service with the provisioned agent on the ISO.
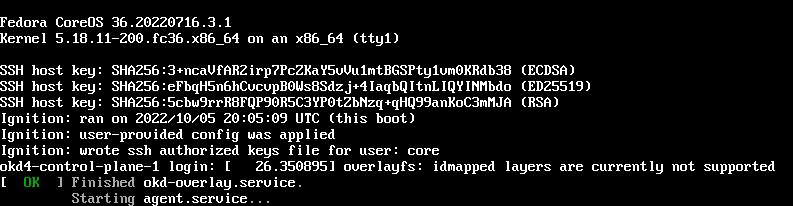

After some time the node will appear in the web ui from the assisted installer:

After that, we can click Next. The following screen tells you your disks will be formatted.
Click Next to continue. The following screen will have some network information. You can take a look at it, after that, hit Next.
Now, you will be presented with the summary screen:
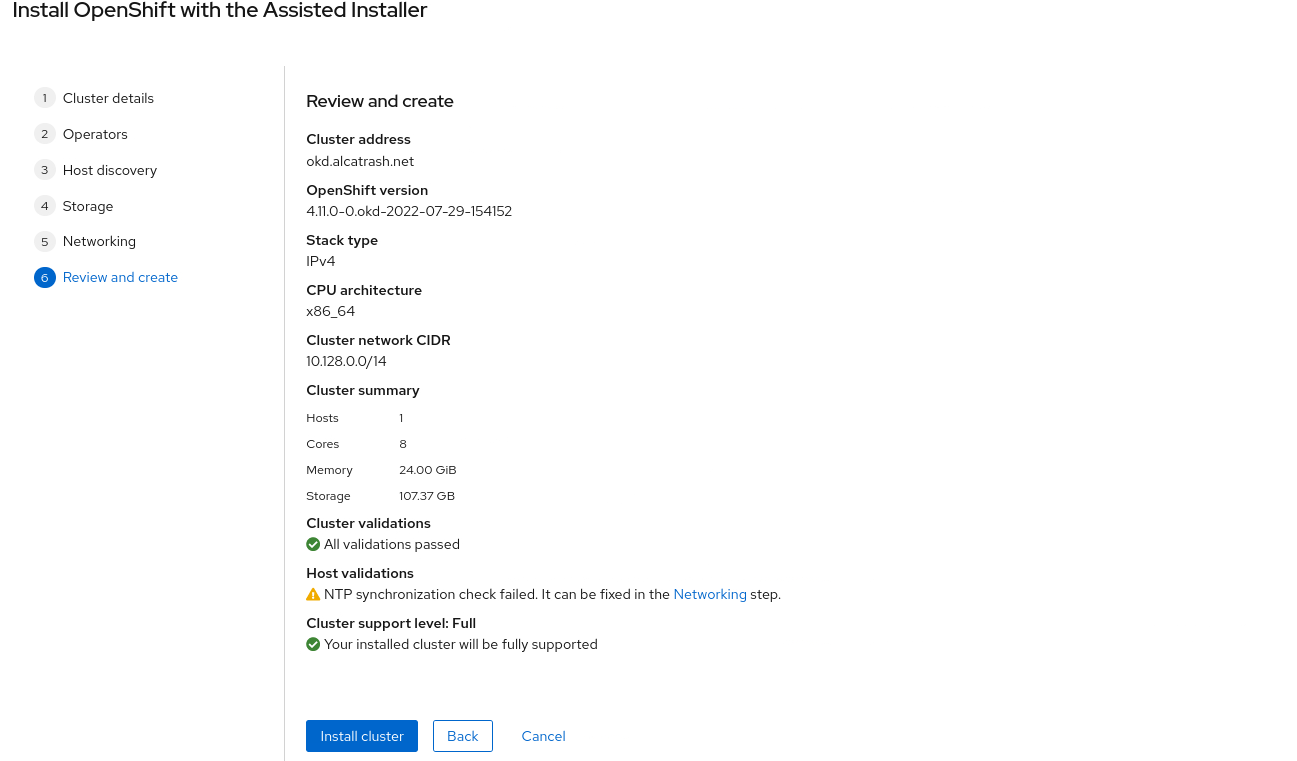

Click on Install cluster.
After that, you can monitor your progress:
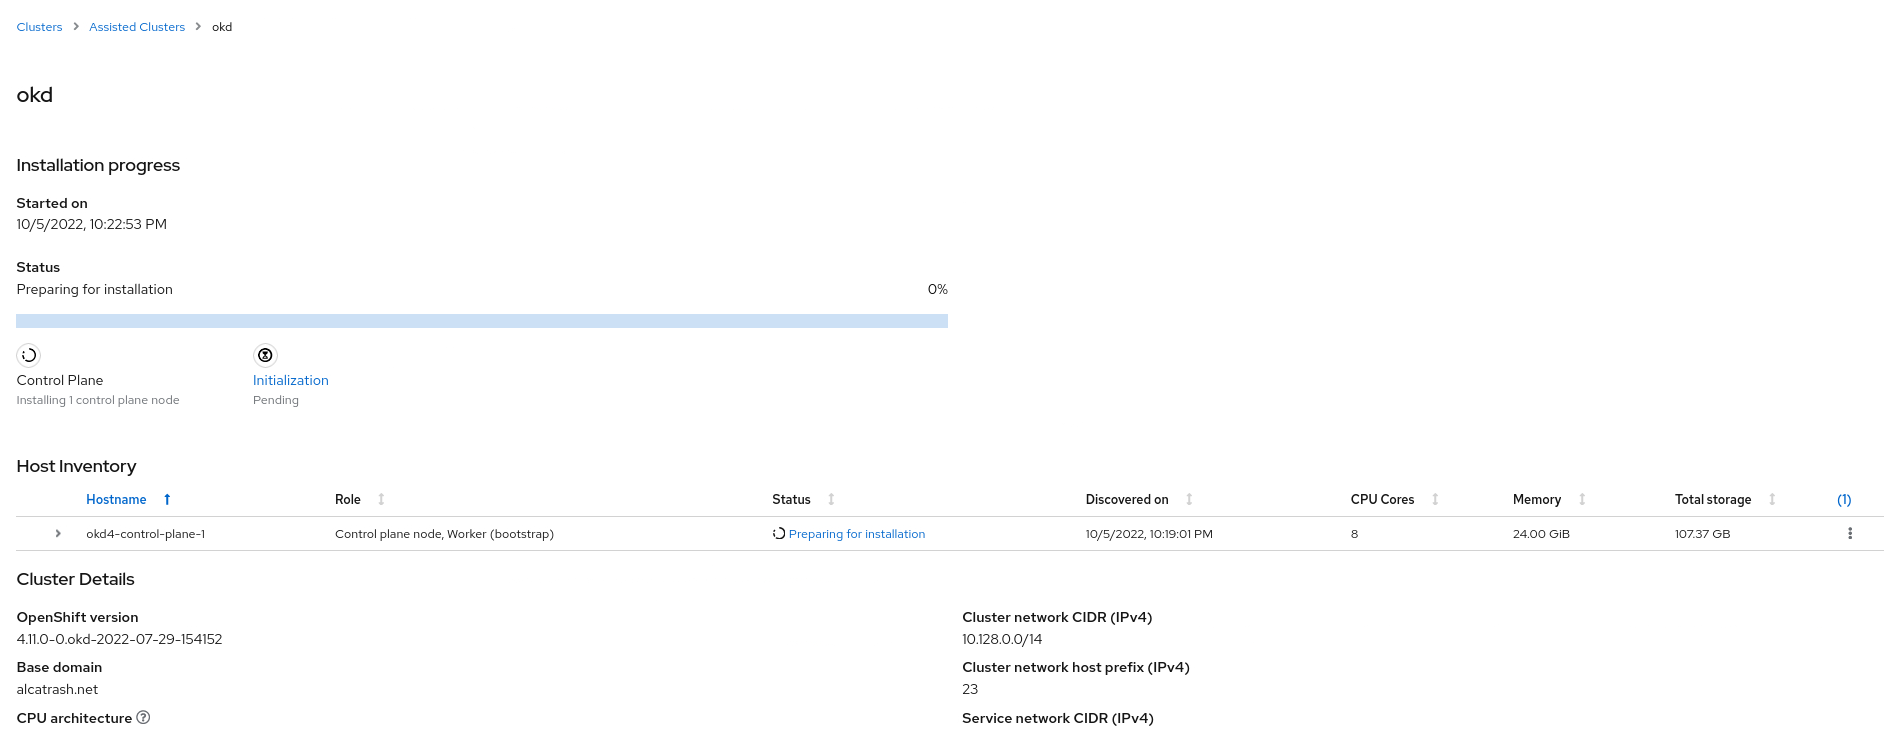

The complete installation will take up to 60 minutes on modern hardware. Grab a cup of coffee and wait some time ;-)
After waiting, you will be presented with this screen:
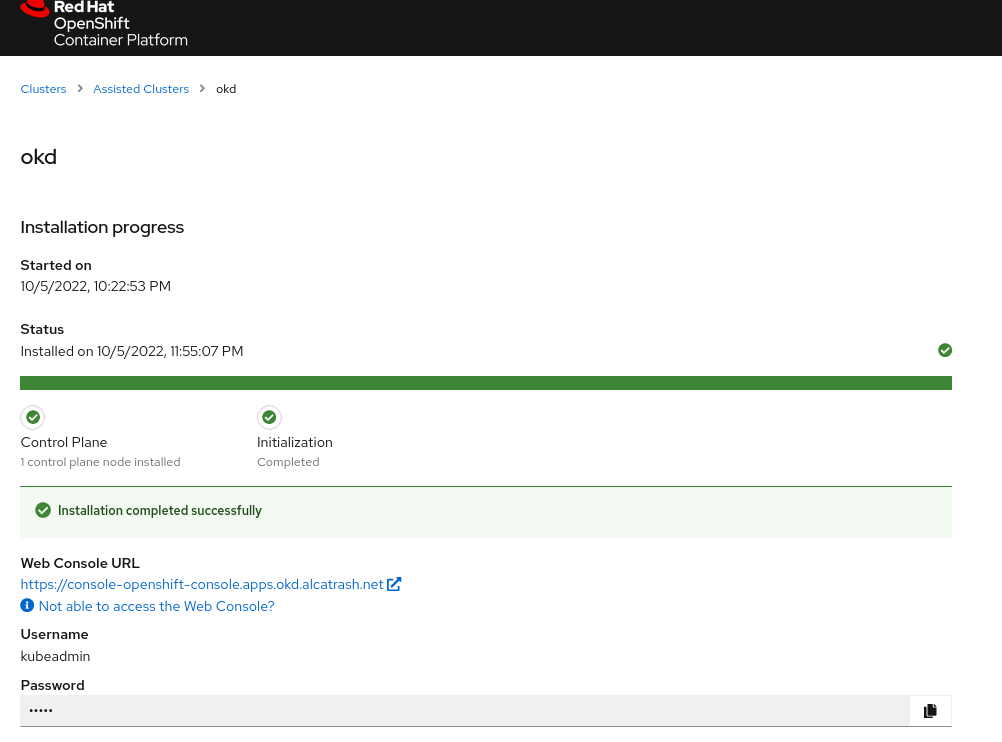

You will see some information on your screen including the console url and the credentials for the kubeadmin user.
Done, what now ?
After clicking the console url you will encounter some self-signed certificate errors. Ignore these, because it is your homelab ;-).
after logging in with the kubeadmin user we can see the shiny web interface of OKD.
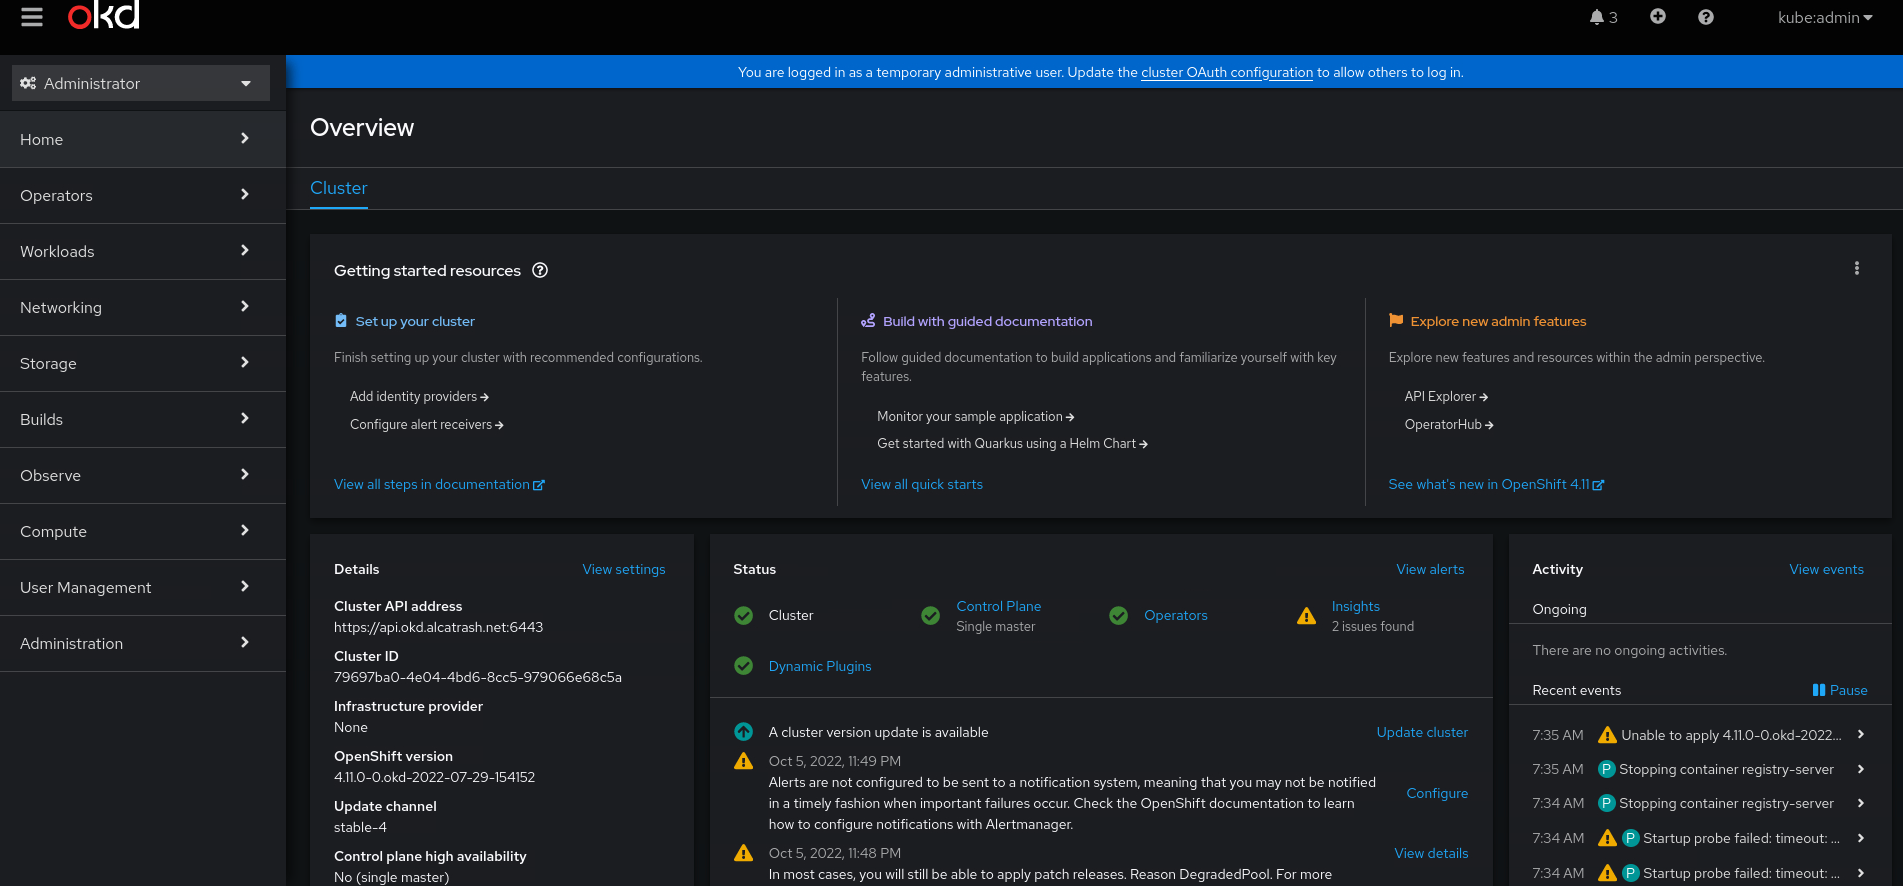

And there it is, your own single node OpenShift / OKD cluster. You can do everything with it, except one thing: upgrading to a new release. That is not possible.
Have fun! And if you have any questions, please contact me through email / linkedin / github or whatever ;-)
