Deploying OpenShift OKD in GCP (Google Cloud)
October 6, 2022Intro
After trying to create a SNO Openshift Node in my Homelab, it was time to scale it up even further and trying to create a OpenShift cluster in the cloud. For this use case i will be using GCP.
Preperations
First, there are some preperations to be done;
- A service account in GCP with a lot of permissions in GCP
- Enable certain API’s in GCP
- A Managed DNS zone in GCP
- Both the
ocbinary and theopenshift-installbinary. - Create a directory structure.
Create a Service account in GCP
- Go to the Google Cloud Console; https://cloud.google.com and log-in there. Go to your favorite project, mine is called
michaeltcloud. - Go to the
IAM & Adminmenu en chooseServiceAccounts. - Click on the button “Create Service Account”
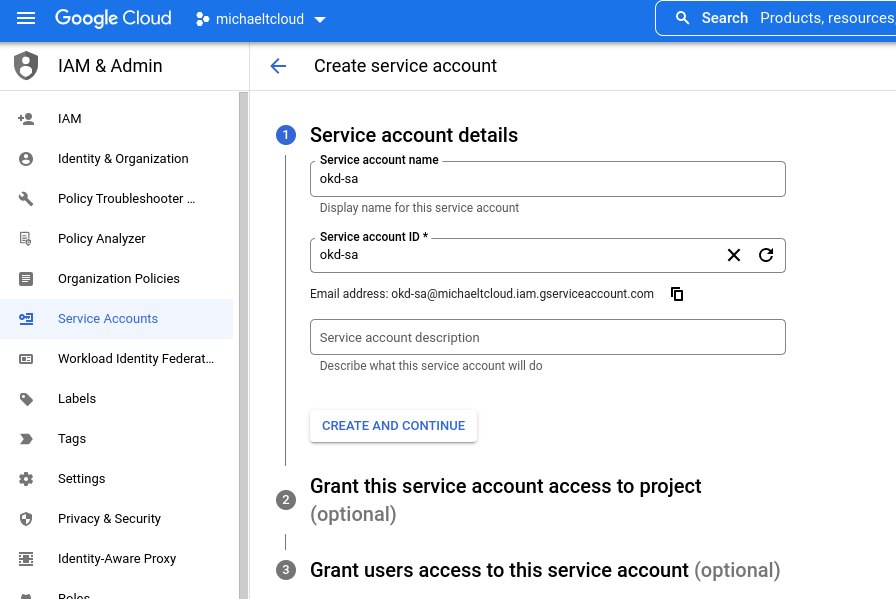
Fill in the name and click on “Create and Continue”. After that, you can grant roles to the newly created service account. This is the official list from Red Hat
Required roles during installation:
- Compute Admin
- Security Admin
- Service Account Admin
- Service Account User
- Storage Admin
- DNS Administrator
- Service Account Key Admin
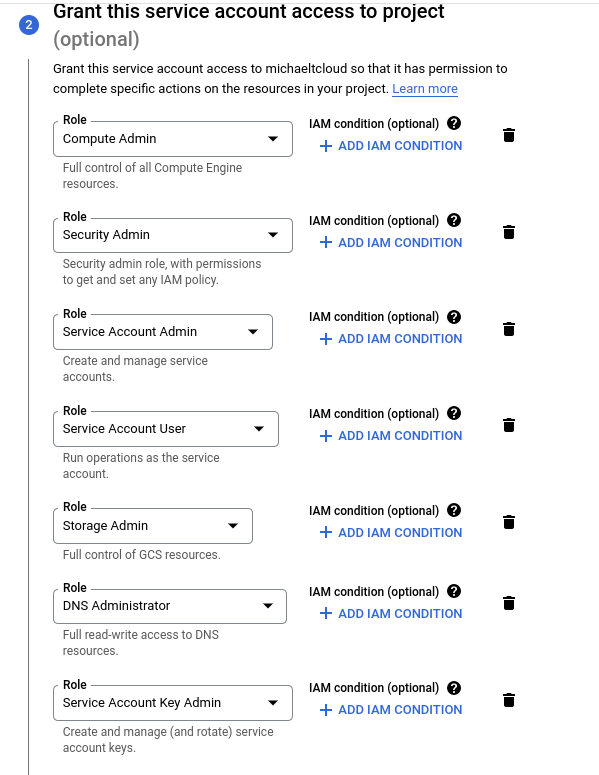
After selecting all roles your service account is ready.
Click on Done. After that, go to the service account page and click on the three-dots next to the newly created service account and click on Manage keys
Click on Add key and choose Create New Key. Choose JSON and download the newly created json file and store it somewhere safe. Afer that, create a directory in your home directory called .gcp and place this file in the directory with the name osServiceAccount.json.
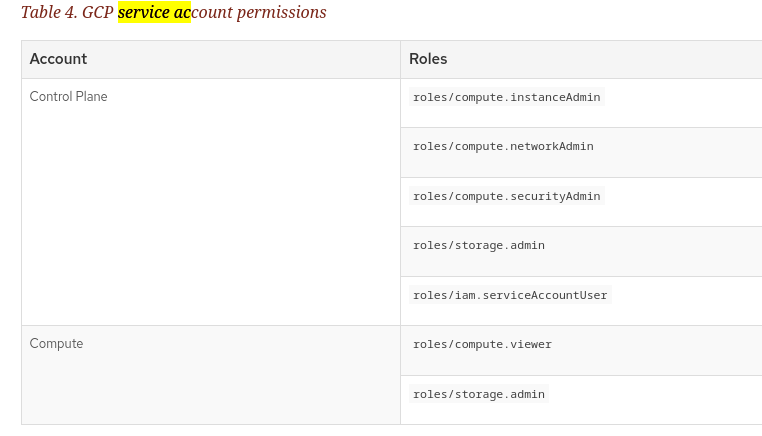
NOTE: The installer will also create 2 new service accounts so the nodes can use them to interact with the google cloud API. The Roles for each type of service account:
Enabling APIs
For the installer to work properly, we need to enable certain APIs. This is the table of APIs that need to be enabled.
| API service | Console service name |
|---|---|
| Compute Engine API | compute.googleapis.com |
| Google Cloud APIs | cloudapis.googleapis.com |
| Cloud Resource Manager API | cloudresourcemanager.googleapis.com |
| Google DNS API | dns.googleapis.com |
| IAM Service Account Credentials API | iamcredentials.googleapis.com |
| Identity and Access Management (IAM) API | iam.googleapis.com |
| Service Management API | servicemanagement.googleapis.com |
| Service Usage API | serviceusage.googleapis.com |
| Google Cloud Storage JSON API | storage-api.googleapis.com |
| Cloud Storage | storage-component.googleapis.com |
This can easily be done by using the gcloud cli tool.
[michael@michael-nb2 ~]$ gcloud services enable compute.googleapis.com
Run this command for every api and you are done.
Creating a managed DNS zone
as mentioned before, OpenShift heavily relies on DNS. So it is key to have DNS zone in your GCP project.
But how do you do that? If you have a spare domain, you can add it entirely to GCP. But you can also designate a subdomain to GCP. That is what i have done. I have a dedicated sub domain zone called gcp.alcatrash.net. The only thing you need to do is create a few NS records at your DNS provider and you are good to go.
These are my NS records for example:

After that, you can create a DNS zone in GCP. Go to your project, search for Cloud DNS. and click on Create Zone.
The zone name will be your sub domain, the DNS Name will be your base domain. After that, click on create.
Downloading the installer
The installer is available at the Releases page on the Github of the OKD Project. https://github.com/okd-project/okd/releases
In this demo we will download the 4.11.0-0.okd-2022-08-20-022919 version.
Scroll down to the assets and copy the links for both the openshift-client and the openshift-install and do a wget for those files. After that, extract them somewhere in a directory in your $PATH.
Create a directory structure
Now, create a directory in your home directory called okd_deploy and a sub directory called install_dir.
[michael@michael-nb2 ~]$ mkdir -p okd_deploy/install_dir
[michael@michael-nb2 ~]$ cd okd_deploy/
[michael@michael-nb2 okd_deploy]$ tree
.
└── install_dir
After that, you are all set. The only thing we need to do is configure the yaml file that will contain all the information for the openshift-install to do its work
The YAML file that will do the magic
The yaml file called install-config.yaml can be either generated by running the openshift-install program interactively. After that, you can edit it to fit your own needs. For now, i will provide the install-config.yaml for you so you don’t have to go into the interactive setup mode.
apiVersion: v1
baseDomain: gcp.alcatrash.net
compute:
- architecture: amd64
  hyperthreading: Enabled
  name: worker
  platform:
    gcp:
      osDisk:
        diskType: pd-ssd
        diskSizeGB: 64
  replicas: 0
controlPlane:
  architecture: amd64
  hyperthreading: Enabled
  name: master
  platform:
    gcp:
      osDisk:
        diskType: pd-ssd
        diskSizeGB: 64
  replicas: 3
metadata:
  creationTimestamp: null
  name: okdlab
networking:
  clusterNetwork:
  - cidr: 10.128.0.0/14
    hostPrefix: 23
  machineNetwork:
  - cidr: 10.0.0.0/16
  networkType: OVNKubernetes
  serviceNetwork:
  - 172.30.0.0/16
platform:
  gcp:
    projectID: michaeltcloud
    region: europe-west4
publish: External
pullSecret: '{"auths":{"....'
sshKey: |
    ssh-rsa AAAAB3NzaC1yc.....
This is the basic yaml file needed for the openshift-install to do it’s work. I will try to explain some things:
baseDomain directive
The base domain directive is your DNS zone you created in GCP. In my case it is called gcp.alcatrash.net.
replicas: 0 directive in the worker section
I have explicitely specified that there will be 0 workers. In that case, we only have a 3 node cluster with combined functions: etcd, controlPlane and worker capabilities. Ofcourse, this is not best practice, but for a lab environment it is perfect.
metadata.name directive
This is the name of your okd cluster, and also will be part of the DNS. Every app will get a DNS record like appname.apps.okd.gcp.alcatrash.net in my case.
platform.gcp.region directive
The region my virtual machines will be deployed.
pullSecret directive
As mentioned in my previous blog a pull secret is needed for this to work. You can get your pull secret from the Red Hat site. Please check my previous blog for more details
ssh-key directive
Paste your public ssh key in here. This can come in handy when ssh’ing into your nodes.
Running the installer
After you created your own personal install-config.yaml, copy it into the install_dir directory:
[michael@michael-nb2 okd_deploy]$ cp install-config.yaml install_dir/
After that, we can run the following command to create the manifests that the installer will use to configure the Openshift cluster:
[michael@michael-nb2 okd_deploy]$ openshift-install create manifests --dir=install_dir/
INFO Credentials loaded from file "/home/michael/.gcp/osServiceAccount.json"
INFO Consuming Install Config from target directory
WARNING Making control-plane schedulable by setting MastersSchedulable to true for Scheduler cluster settings
INFO Manifests created in: install_dir/manifests and install_dir/openshift
As you can see, the installer gives a warning that we don’t have any worker nodes, to the masters will be schedulable. This is fine, because it is a lab environment anyway.
After that, we can create the ignition files. The ignition files are used for the Virtual machines. Ignition files contain information for CoreOS to know what to install and what to do.
[michael@michael-nb2 okd_deploy]$ openshift-install create ignition-configs --dir=install_dir/
INFO Consuming Common Manifests from target directory
INFO Consuming OpenShift Install (Manifests) from target directory
INFO Consuming Openshift Manifests from target directory
INFO Consuming Master Machines from target directory
INFO Consuming Worker Machines from target directory
INFO Ignition-Configs created in: install_dir and install_dir/auth
The files are now created. Let’s see which files are created here:
[michael@michael-nb2 okd_deploy]$ tree
.
├── install-config.yaml
└── install_dir
    ├── auth
    │   ├── kubeadmin-password
    │   └── kubeconfig
    ├── bootstrap.ign
    ├── master.ign
    ├── metadata.json
    └── worker.ign

2 directories, 7 files
Now, it is time to create the cluster in GCP:
[michael@michael-nb2 okd_deploy]$ openshift-install create cluster --dir=install_dir/
INFO Consuming Bootstrap Ignition Config from target directory
INFO Consuming Master Ignition Config from target directory
INFO Consuming Worker Ignition Config from target directory
INFO Credentials loaded from file "/home/michael/.gcp/osServiceAccount.json"
...
This will take anywhere between 20 - 40 minutes. In this time, you will see resources being created. I think the resources are created by terraform.
After a while, the setup has ended.
[michael@michael-nb2 okd_deploy]$ openshift-install create cluster --dir=install_dir/
INFO Consuming Bootstrap Ignition Config from target directory
INFO Consuming Master Ignition Config from target directory
INFO Consuming Worker Ignition Config from target directory
INFO Credentials loaded from file "/home/michael/.gcp/osServiceAccount.json"
INFO Creating infrastructure resources...
INFO Waiting up to 20m0s (until 5:16PM) for the Kubernetes API at https://api.okdlab.gcp.alcatrash.net:6443...
INFO API v1.24.0-2368+b62823b40c2cb1-dirty up
INFO Waiting up to 30m0s (until 5:29PM) for bootstrapping to complete...
INFO Destroying the bootstrap resources...
INFO Waiting up to 40m0s (until 5:55PM) for the cluster at https://api.okdlab.gcp.alcatrash.net:6443 to initialize...
INFO Waiting up to 10m0s (until 5:31PM) for the openshift-console route to be created...
INFO Install complete!
INFO To access the cluster as the system:admin user when using 'oc', run
INFO     export KUBECONFIG=/home/michael/okd_deploy/install_dir/auth/kubeconfig
INFO Access the OpenShift web-console here: https://console-openshift-console.apps.okdlab.gcp.alcatrash.net
INFO Login to the console with user: "kubeadmin", and password: "xyz"
INFO Time elapsed: 28m2s
Done
After clicking the console url you will encounter some self-signed certificate errors. Ignore these, becaust it is only a lab environment.
after logging in with the kubeadmin user we can see the shiny web interface of OKD.
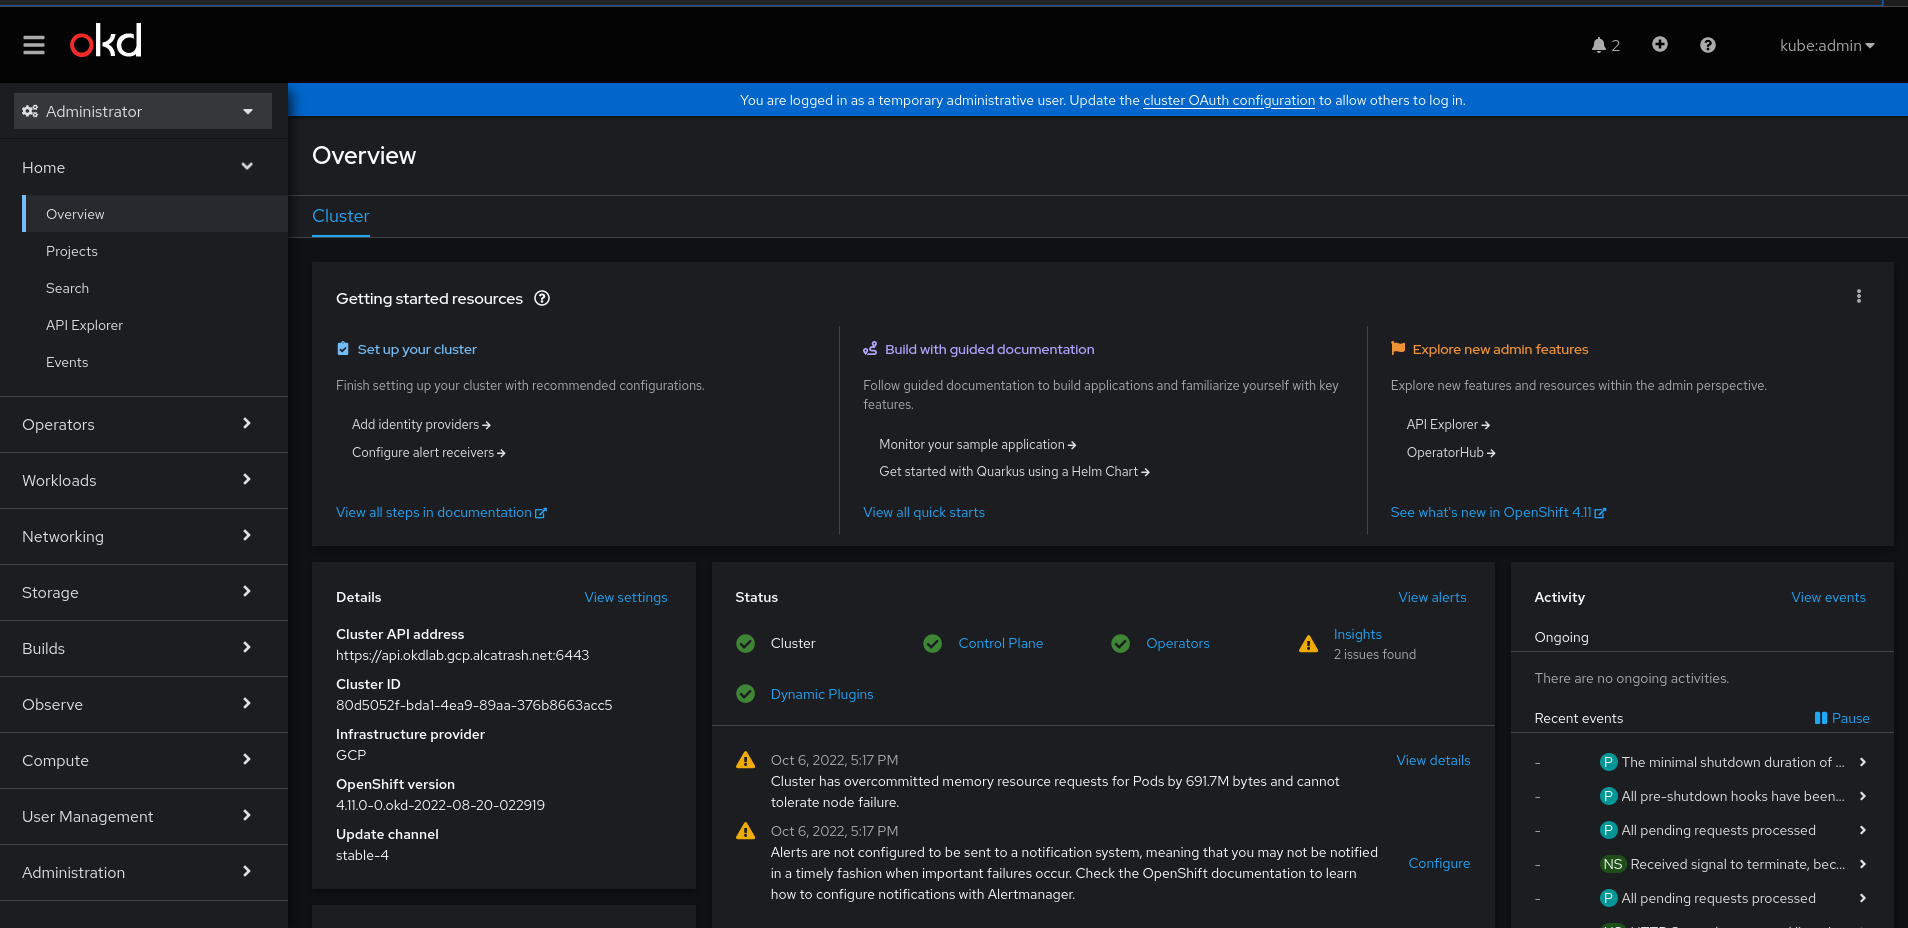
And there it is, your own 3 node OpenShift / OKD cluster. You can do everything with it. For example; i used it when studying for the DO280 exam.
Have fun! And if you have any questions, please contact me through email / linkedin / github or whatever ;-)
